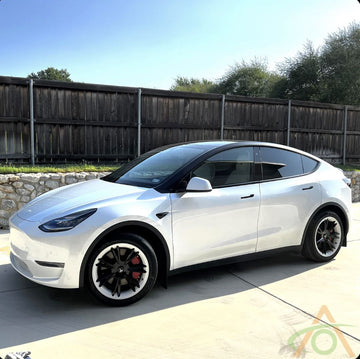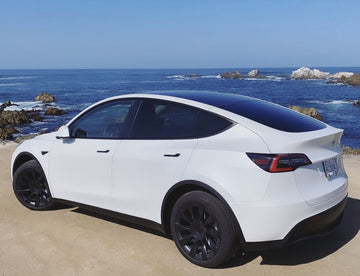
Unlock Your Tesla's True Potential: Adventure Awaits with a Roof Rack!
Dreaming of weekend getaways packed with bikes, kayaks, skis, or extra gear, but your Tesla Model Y or Model 3's sleek interior feels just a bit too snug? The solution is soaring right above you: a roof rack for Tesla! More than just bars, it's your ticket to transforming your electric vehicle into the ultimate adventure companion. Let's dive into how a Tesla rack can kickstart your next exciting journey.
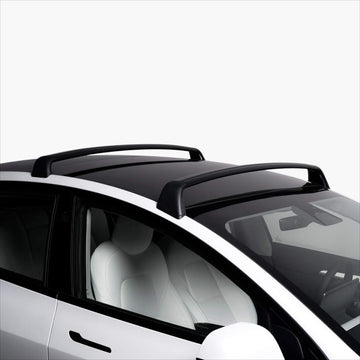
What Exactly is a Tesla Roof Rack?
Think of it as a secure, elevated platform mounted directly onto your Tesla's roof. It typically consists of two robust crossbars running perpendicular to the direction of travel. These crossbars provide the foundational attachment points for various carriers:
-
Roof Boxes: Perfect for bulky luggage, camping gear, or anything you want protected from the elements.
-
Bike Racks: Securely transport 2-4 bicycles without folding seats down.
-
Water Sports Carriers: Kayaks, canoes, SUPs, and surfboards travel with ease.
- Ski/Snowboard Carriers: Hit the slopes without cramming gear inside.
Crucially, Tesla roof racks are engineered specifically for your vehicle. They integrate seamlessly with the mounting points hidden beneath the roof's weather stripping, ensuring a secure fit that maintains the car's sleek lines and aerodynamics. Seeing a Tesla with roof rack ready for action is a sign of adventures to come!
Can I Install a Roof Rack on My Model Y or Model 3? Absolutely!
Yes! Both the Tesla Model Y and Model 3 come equipped with integrated mounting points designed explicitly for Tesla's own roof rack system. This means:
-
Direct Compatibility: No need for clunky universal racks or risky aftermarket solutions that might damage your paint or roof structure.
-
Engineered Integration: Tesla's official roof rack for Tesla Model Y and Tesla roof racks model Y/3 are designed to work perfectly with the vehicle's roof curvature and aerodynamics, minimizing wind noise and range impact.
-
Secure Attachment: They bolt directly into reinforced points, providing maximum security for your precious cargo and your car.
How to Select the RIGHT Tesla Roof Rack (Key Considerations)
Choosing the best Tesla rack involves more than just clicking "buy." Here's what matters:
-
OEM vs. High-Quality Aftermarket: Tesla's own roof rack is the gold standard for guaranteed fit, aerodynamics, and ease of installation. Reputable aftermarket brands like Yakima or Thule may offer Tesla-specific kits, but always double-check compatibility, weight ratings, and aerodynamic claims against the OEM option. For guaranteed seamless integration, OEM is often recommended.
-
Weight Capacity is King: Every rack has a maximum dynamic (while driving) and static (parked) weight rating. Exceeding this is dangerous! Consider the combined weight of your carriers and the gear inside them. Tesla's official rack has robust ratings – ensure any alternative matches or exceeds them safely.
-
Aerodynamics & Noise: A poorly designed rack creates wind roar and hurts your range. Tesla's OEM rack is meticulously shaped to minimize drag and noise. Look for sleek, aerodynamic profiles if considering alternatives. The best Tesla with roof rack setup is one you barely notice (until you need it!).
-
Ease of Installation & Removal: How often will you take it off? Tesla's rack is designed for relatively straightforward owner installation using the detailed guide. Check reviews for ease if looking elsewhere.
-
Locking Capability: Protect your investment! Many racks (including Tesla's) have integrated locks or offer optional lock cores to secure the rack itself to the car and deter theft.
Tesla Roof Rack Installation: Pro Tips for Success
Installing your roof rack for Tesla Model Y or 3 is manageable, but precision matters. Follow the official Tesla guide meticulously! Here are key tips:
-
Cleanliness is Crucial: Thoroughly clean the roof channel and weather stripping where the feet mount. Any grit can cause damage or prevent a proper seal.
-
Mark the Spot: Use painter's tape to mark the exact mounting positions shown in the guide before removing the weather stripping caps. Accuracy prevents misalignment.
-
Gentle Weather Stripping Removal: Carefully peel back the weather stripping to expose the mounting points. Avoid stretching or tearing it.
-
Align Perfectly: Place the rack feet precisely over the mounting points. Double-check alignment before tightening.
-
Torque Specs are NOT Optional: This is critical. Use a torque wrench to tighten the bolts exactly to the specification in the manual (usually quite low, around 4-5 Nm). Overtightening can crack the glass roof or damage the mounting points. Under tightening is unsafe.
-
Re-seal Thoroughly: Ensure the weather stripping is pressed back down firmly and evenly around the entire foot for a watertight seal.
-
Test Load & Re-Torque: After installation and before a big trip, place a moderate load on the rack. Drive carefully for a short distance. Stop and re-check the torque on all bolts. Re-torque if necessary.
-
Check Seals Regularly: Periodically inspect the weather stripping around the feet for any signs of lifting or damage, especially after car washes or heavy rain.
Gear Up and Go!
Adding a Tesla roof rack to your Model Y or Model 3 is more than an accessory; it's an investment in freedom and adventure. By choosing the right rack (prioritizing fit, safety, and aerodynamics) and installing it correctly, you unlock incredible versatility without compromising the Tesla experience. Whether it's Tesla roof racks model Y for family camping or a sleek setup on your Model 3 for bikes, you're ready to carry more and explore further.